When to use a ND grad filter
A ND grad filter is useful in conditions where you cannot have both the sky and the rest of your image exposed correctly, for instance in backlit conditions. You will use a graduated grey filter to "hold back" the sky (make it darker).
Here is a landscape photo taken without any filter. The sky is overexposed.

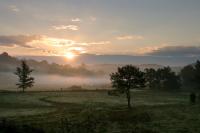
The same photo taken with a 2 stop ND grad filter on. The sky and meadow are properly exposed.

Which type of ND grad should you choose ?
Screw vs slide in filters
Some brands (for instance Tiffen) propose screw in ND grad filters. I do not recommend these as you cannot adjust them vertically to move the filter area of effect.
Slide in filters are rectangular and made of coated resin. You normally need a filter holder to use them. Alternatively, you can simply hand hold them in front of your lens, when using a tripod.
Filter size
Slide in ND grads exist in two main sizes : Cokin P size is the one you are looking for if you are using a digital or analog SLR. They fit on the Cokin P size filter holder and are 84mm wide.
The larger (and more expensive) 4x6 size filters are suited for Lee holders and generally used on medium format cameras.
Filter density
ND grad filters exist in various densities to accomodate different lighting conditions.
Depending on the brands, they can range from 1 stop to 5 stops. The denser the filter, the stronger the effect is (the skies turn darker).
2 and 3 stops ND grads are the most useful ones.
1 stop will have barely visible effects, especially with a soft step filter (see below). You can stack two filters for more extreme backlighting conditions.
Filter stepping
You will generally have a choice between hard and soft step ND grads. You can see the difference below:

Hard step filters are used when you have a fast transition between the sky and the ground. This includes when shooting a sunset at sea, for instance.
Soft step filters are used when trying to hold back the sky on a landscape that includes trees or steep hills, in order to avoid darkening them too much.
Using the ND grad filter
Memorize exposure on the lightest area of the ground and slide in a filter with adapted density before taking the picture.
To adjust the filter position precisely, press the depth of field preview button of your camera. If you are shooting at f/8 or above (typical apertures when making landscapes), the image in your viewfinder will turn darker and the filter's area of effect will be far more visible.
Example photos

On this photo, the lightest area is near the horizon. I used a reverse ND grad filter to handle this.

For this sunrise, I had to use stacked filters as the difference between the skies and the ground was more than 3 stops.
Which brand to choose?
I started with an inexpensive kit made of a Cokin P filter holder with an adapter ring and a 2 step ND grad. I later switched to the more expensive Singh Ray filters, which have several advantages over the Cokin:
- Their rectangular shape gives more range for adjusting the filter vertically
- Their color is more neutral while the Cokins show color shifts towards the red
- They are less sensitive to scratching, especially if you keep them in the provided pouch (which I strongly recommend)
Singh Ray filters are a bit of a luxury and no one would like to lose them.
One day, as I was shooting in Brittany, a gust of wind took one off my hand and carried it away. It landed a few meters down a cliff, blocked by a small bush. I crawled down the cliff to recover it, holding mysleft to vegetation and getting fairly scratched in the process, but managed to get it back!